Update: Arlecchino’s build has been updated for Genshin Impact 5.3 on January 22, 2025.
Arlecchino, the fourth Fatui Harbingers, is currently rerunning in Genshin Impact 5.3. She is one of the strongest Pyro DPS characters in the game and can destroy most challenges in the game pretty easily. With Snezhnaya being the next destination for Genshin Impact, it might be a good option to get your hands on her in 5.3. If you are planning to pull for Arlecchino, here is how you can best build her in Genshin Impact.
Genshin Impact Arlecchino Build: Overview
Looking for the best Arlecchino build? Here is a quick overview of the fourth Fatui Harbinger’s best build in Genshin Impact:
- Artifact: Fragment of Harmonic Whimsy (4-piece)
- Weapon: Crimson Moon’s Semblance (5-star) /Ballad of the Fjords (4-star)
- Main Stats: Attack % (Sands), Pyro Damage (Goblet), and Crit Damage (Circlet)
- Sub Stats: Crit Rate ≡ Crit Damage > EM (Vape) > Attack % > Energy
Arlecchino Kit and Best Rotation

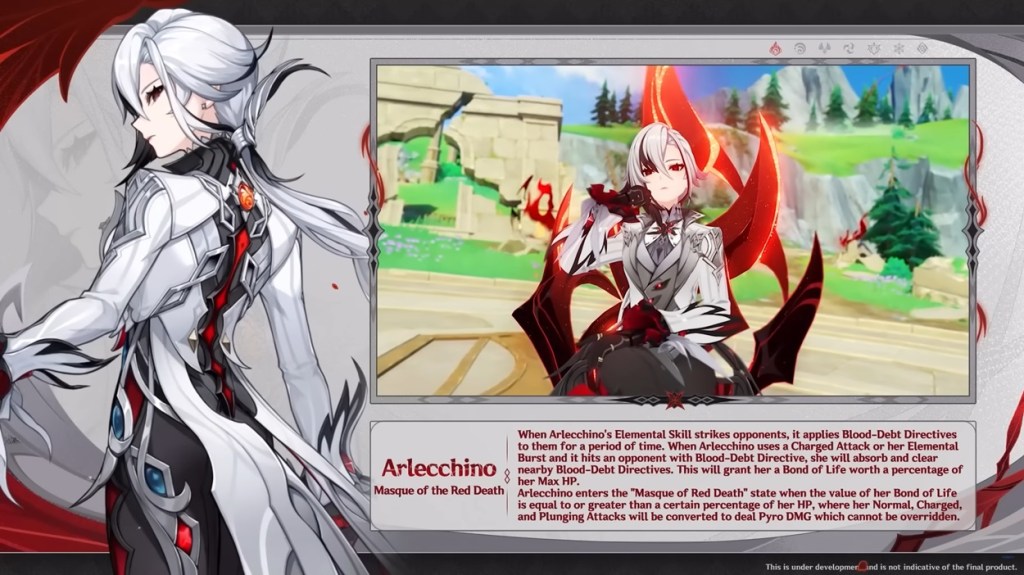
Arlecchino will have a hyper carry kit with her Normal Attacks being the biggest source of damage output. Her kit revolves around the status effect Bond of Light, which increases her Normal Attack damage output significantly. She applies the Blood Debt Directive on enemies after using her Skill and then absorbs it to apply Bond of Light on herself. This puts Arlecchino in the Masque of the Red death state, which infuses her Normal Attacks with Pyro and increases the damage significantly. Let’s take a look at her kit:
- Arlecchino scales completely on Attack, so you can focus on her Attack and Crit stats while building her.
- Her skill applies Blood Debt Directive on enemies, which she then absorbs to apply Bond of Life on herself.
- When Arlecchino has a Bond of Life greater than 20% of her Max HP, she enters the Masque of the Red death state, and her Normal Attacks become Pyro-infused.
- Arlecchino cannot receive healing when she has Bond of Life.
- Her Ultimate does a significant AoE Pyro damage and heals her, making her sustainable as a unit.
Genshin Impact Arlecchino Build: Best Artifacts

The best artifact set for Arlecchino is “Fragment of Harmonic Whimsy. Arlecchino is a normal attack-focused Pyro DPS and she is very versatile. Her damage increases based on the Bond of Life applied to her and she can feature in Electro, Vape, and Mono Pyro teams. She scales completely on Attack, and her damage output greatly depends on her Crit stats.
Stack as much Attack and Crit Stats as you can on her to get the most damage output. When it comes to her Energy Recharge, try to get 120% through sub-stats in Mono Pyro teams and around the same for her other teams.
Here are all the artifacts you can use for her, including the best and alternatives.
- Fragment of Harmonic Whimsy (Best artifact for Arlecchino)
- Gladiator’s Finale (Best Alternative)
- Gilded Dreams
Fragment of Harmonic Whimsy is the best Artifact for Arlecchino as it is a Bond of Life artifact set, tailored for Arlecchino’s kit. It gives an 18% attack boost and another 18% Damage increase for 6 seconds (max 3 stacks) when the Bond of Life value on her changes. Other than that, the Gladiator’s Finale is also a great artifact set for Arlecchino, especially if you have good sub-stats on them. The Gilded Dreams set is also good for Arlecchino Vape teams.
Arlecchino Main and Sub-Stats Priority
Arlecchino is going to be a Hypercarry DPS and her main source of damage is going to be her Pyro-infused normal attacks. For Arlecchino’s best build, Attack, Crit Rate/Damage, EM, and ER are her most important stats. Elemental Mastery only becomes important if she is in a Vape team, otherwise, you can also add HP to keep her alive. Therefore, prioritize her stats in this order: Crit Rate ≡ Crit Damage > Attack% > Elemental Mastery (Vape) > Energy.
- Sands: Attack %
- Goblet: Pyro Damage
- Circlet: Crit
- Sub stats: Crit Rate ≡ Crit Damage > EM (Vape) > Attack % > Energy
Arlecchino Talents

- Invitation to a Beheading (Normal Attack): Arlecchino performs a maximum of 6 consecutive strikes, a charged attack which dashes toward a nearby enemy and cleaving once, and continuously holding the button causes Arlecchino to engage in up to 3 seconds of high-speed movement, and a plunge attack that deals AoE damage along the path and upon impact. Furthermore, Arlecchino enters the Masque of the Red death state when she has a Bond of Life equal to or greater than 20% of her Max HP, her normal, charged, and plunge attacks are converted to Pyro damage. Additionally, her Normal attacks deal extra damage, scaling on her Attack multiplied to a ratio of her current Bond of Life percentage. This state consumes 6.5% of her current Bond of Life and in this way, the Bond of Life gets consumed every 0.05 seconds. When her Bond of Life is consumed in this way, the All is Ash skill’s cool-down decreases by 0.8 seconds.
- All is Ash (Skill): Summons Balemoon Bloodfire, performs a dash cleave against a nearby enemy dealing AoE Pyro Damage, and applies a Blood-Debt-Directive to the enemies. The Blood-Debt-Directive lasts 30 seconds and every 5 seconds it deals one instance of Pyro Damage, considered as Elemental Skill Damage, to the enemy (max 2 instances). When using her charged attack or Balemoon Rising, she absorbs and clears the nearby Blood-Debt Directive, and each absorption gives her a Bond of Life worth 40% of her max HP. She can get a maximum of 80% of her Max HP of Bond of Life within 35 seconds after using her Elemental Skill. Using the Elemental Skill again during this duration will restart the count on duration and the limit on the value of Bond of Life she may gain from Blood-Debt Directives.
- Balemoon Rising (Elemental Burst): Arlecchino deals AoE Pyro damage and resets the Cool Down for All is Ash and heals her. The healing is based on her Bond of Life value and ATK.
Arlecchino Passives

- Cinders Alone Shall Nourish: Arlecchino gains 40% bonus to Pyro Damage and can only be healed through Balemoon Rising while in combat.
- Agony Alone May Be Repaid:
- Blood-Debt Directives have the following characteristics:
1. Defeating an opponent with a Directive grants Arlecchino a Life Bond worth 70% of her Max HP.
2. Upgrades Directive to Blood-Debt Due after 5 seconds of the Directive is applied. When absorbed, it grants Arlecchino a Bond of Life worth 70% of her Max HP.
3. A Bond of Life created in the aforementioned ways cannot exceed the original limit on the value of Bonds of Life obtained through the All is Ash Skill. - Strength Alone can Defend: She gains 1% of All Elemental and Physical Resistance for every 100 Attack she has over 1,000. The maximum Resistance increase she can gain this way for every 100 Attack is 20%.
Best Weapons for Arlecchino

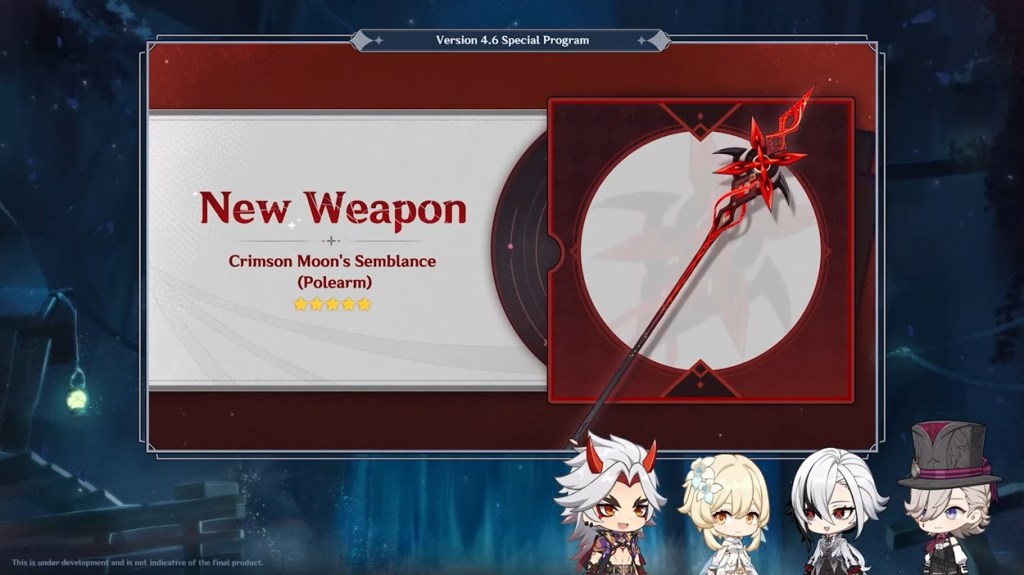
Arlecchino’s signature weapon, Crimson Moon’s Semblance, is also her best weapon. This weapon provides her a Bond of Life equal to 18% of her Max HP when a Charged attack hits an opponent, triggered once every 14 seconds. Furthermore, it also increases her damage based on the percentage of Bond of Life applied to her.
Here are all the weapons that can be used with her to get the best out of her kit:
- Crimson Moon’s Semblance (Signature Weapon)
- Staff of the Scarlet Sands (Best for Vape Teams)
- Primordial Jade Winged-Spear
- Staff of Homa
- Ballad of the Fjords
Arlecchino Constellations

- All Reprisals and Arrears Are Mine to Bear (C1): Masque of the Red Death is increased by 120%. Furthermore, her interruption resistance is increased when she does Normal attacks while in the Masque of the Red Death state.
- All Rewards and Retribution, Mine to Bestow…(C2): Blood-Debt Directives are enhanced to Blood-Debt Due when first applied. When she absorbs it, she unleashes Balemoon Bloodfire in front of her, dealing 900% of her Attack as AoE Pyro Damage, triggered once every 10 seconds.
- You Shall Become a New Member of Our Family…(C3): Normal Attack level + 3 up to level 15 max.
- You Shall Love and Protect Each Other Henceforth…(C4): When Arlecchino successfully absorbs a Blood-Debt Directive, Balemoon Rising’s Cooldown decreases by 2 seconds and 15 Energy is restored to her. This effect can occur once every 10 seconds.
- For Alone, We Are as Good as Dead…(C5): Elemental Burst level + 3 up to level 15 max.
- From This Day On, We Shall Delight in New Life Together (C6): The Balemoon Rising damage is increased by Arlecchino’s Attack multiplied by 700% of her current Bond of Life percentage. Additionally, her Normal attacks and Elemental Burst gain a 10% increase in Crit Rate and 70% increased Crit Damage, for 20 seconds after using All is Ash. This effect can be triggered once every 15 seconds.
As with the trend of recent Genshin Impact characters, Arlecchino’s constellations also seem very important for her damage output. Her Constellation 1 and Constellation 2 increase her attack by 25 to 50%, which is a massive jump, while the C1 also increases her interruption resistance. If you have the spare Primogems, I would recommend you go for her C1 or C2 if you want to fully build her. Share your thoughts on Arlecchino in the comment section and let us know if you are going to pull her in Genshin Impact 5.3.
Source: Beebom


